A Step-by-Step Guide to Smoking the Perfect Brisket

Aug 29, 2022


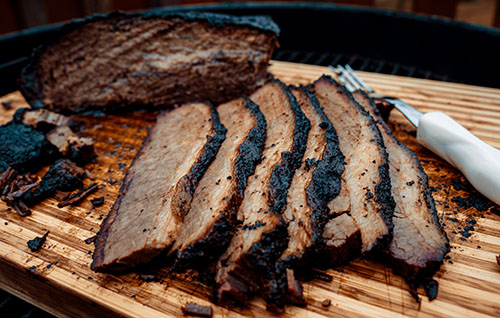
With Labor Day just one week away, it’s time to fire up the grill and gather your supplies. How about surprising your guests with a spicy, smokey, or sweet brisket that will melt in their mouths? Even if you are not quite confident in your grilling ability, follow the six simple steps below for guaranteed juicy and tender results: 
 
  1. Choose your cut
The three most common United States Department of Agriculture (USDA) grades of brisket to choose from are prime, choice, and select. Prime is a choice brisket that has received the highest mark of the cuts. Typically, it will have a softer feel and the most extensive marbling in terms of fat, which leads to a more flavorful product. Choice brisket is the most common grade and is a tender and juicy alternative to prime. Although choice cuts tend to cost more per pound, in many cases, it is worth the money to purchase choice grade rather than lower quality, select grade cuts. In whatever cut you choose, look for a brisket that is roughly equal in thickness along all sides to ensure even cooking at home.
 
  1. Trim your brisket
Remove large chunks of fat that will not render down and keep your rub from penetrating as the meat cooks. Use a sharp, boning knife and start trimming while the brisket is cold, which will make the fat easier to slice through. Slice off the softer fat that encases the cut to less than ¼-inch thickness and remove any fatty edges or seams that run through the meat. Round off the corners as they will dry out and burn faster than the rest of the meat.
 
  1. Make a rub
Brisket rubs are the key to a mouthwatering flavor and can be made with numerous different recipes. Texas-style smoked brisket rubs have only two ingredients — coarse salt and coarse black pepper. Although sometimes simpler is better, many people prefer to add a few extra seasonings to the rub such as paprika, garlic powder, brown sugar, or onion powder.
 
  1. Smoke the meat
When smoking a brisket, “low and slow” should be your guiding principle. Smoke your brisket at 250 degrees for roughly 12 to 18 hours. Although cooking times will vary depending on the size of the brisket and the smoker, a good rule of thumb to follow at this temperature is to assume it will take an hour to an hour and a half per pound. Mesquite wood is a popular option, while post oak delivers a classic smokey flavor and fruitwood results in a sweeter taste.
 
  1. Wrap it up
Wrapping your brisket is key for tender meat and flavorful bark. When the brisket’s internal temperature reaches 165 degrees, wrap it in peach paper until the temperature rises between 195 and 215 degrees. At this point, it’s time to probe the meat — when your probe feels like it’s going through room-temperature butter, the brisket is done.
 
  1. Let it rest
Leaving your brisket wrapped in the peach paper, let it rest for at least an hour before slicing to give the juice time to soak into the meat. Now the only thing left to do is to serve and enjoy!
 
Your local Co-op has grilling supplies and seasonings for your next cookout, so stop by before the holiday weekend! Find the nearest location information here.
 
For more content like this, check out the latest issue of The Cooperator.

Read More News

Apr 14, 2025
Before the weather even turns warm, many gardening enthusiasts are already making plans and studying seed choices for their home garden. Although many Tennessee residents have plenty of room for a garden, others may not be so lucky. If you’re hampered by a lack of space for your gardening choices, raised beds might be a solution.
 
Apr 07, 2025
Easter is a time for family fun, festive traditions, and, of course, beautifully decorated eggs! If you raise backyard chickens, you have the unique opportunity to collect eggs in natural shades of blues, greens, browns, and creams — perfect for a colorful Easter basket before you even break out the dye.
 
Mar 31, 2025
As we welcome the spring gardening season, it's the perfect time to also kick off a little spring cleaning! Why not combine the two and give your garden tools the care they deserve before they're put to work? It can be easy to toss your tools in the shed and forget about them, but with proper maintenance, these tools can be a long-lasting investment.