Spring Cleaning: Tractor Edition
Mar 14, 2022

Everybody loves spring, but nobody likes to clean. Farm equipment, such as tractors, can be an especially daunting task considering the amount of wear and tear that they typically go through. Cleaning your tractor is not just great for aesthetics, but also for functionality and longevity. Mud, leaves, grass, and other debris can easily become lodged into places that it should not be, which is likely to lead to damage and repairs in the future if not properly dealt with.
Here is a basic step-by-step guide on how to clean a tractor:
Step 1: Remove debris from tractor exterior.
The first step in cleaning your tractor is to remove any obvious debris that is stuck on the exterior. Just like when cleaning your vehicle, you do not want to scratch the paint or damage the finish by rubbing too hard on gravel or leaves. Consider using a leaf blower to easily remove debris that is stuck underneath the tractor without having to strain your back.
Step 2: Wash the tractor exterior.
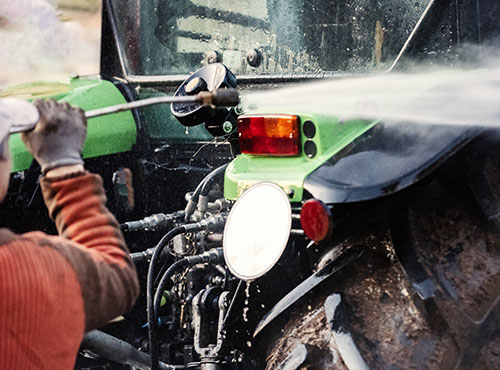
There are two common ways to accomplish this step, either by using a pressure washer or by using a hose and a rag. If using a pressure washer, spray off the tires first to prevent mud from splashing back up on the area you just cleaned, and then spray off the rest of the tractor, including underneath. Use caution not to let the water pressure damage any fragile parts, and avoid spraying any sensors. If you decide to go the old-fashioned but reliable route of using a hose and some elbow grease, mix one pump of dish soap in a warm bucket of water and use a soft rag to wipe down the tractor’s exterior. Work in small sections and rinse each section before moving on to the next to prevent soap buildup.
Step 3: Let the tractor dry.
After you have completely washed your tractor, you will need to let it dry before moving on to Step 4. If you have plenty of time, simply let your tractor air dry and never have to lift a finger. If you are in a hurry, use a leaf blower to knock all the water droplets off.
Step 4: Wax the tractor.
Once the tractor is dry, consider waxing it to protect the paint from scratches and damage. Surfaces that have been waxed also tend to be easier to clean and may speed up the process for next time.
Step 5: Clean the tractor interior.
Once the exterior of your tractor is clean, you can move to the interior. Use a damp cloth to carefully wipe around joystick controls, screens, and terminals and wipe any mud and dust off of the dash and seat. Use a shop vac to remove dirt from the floorboards.
Now that your tractor is shiny, you’re all set to go get it dirty again! Just remember, routine cleaning and maintenance will save you time and money down the road. Your local Co-op has all the cleaning supplies, tools, and repair parts that you need to get your tractor ready for spring, so visit us today!
For more content like this, check out the latest issue of the Cooperator.